A functional water heater is a cornerstone of everyday comfort in our homes. It ensures we have hot water for showers, dishwashing, and various household tasks. However, a water heater’s performance may deteriorate over time if the heating element wears out or malfunctions. In this comprehensive guide, the experts at Made’s Plumbing will take you through the step-by-step process of replacing a heating element in a water heater, ensuring you can restore your hot water supply efficiently.
Understanding the Importance of a Healthy Heating Element
Before looking into the replacement process, it’s crucial to grasp the significance of a well-maintained heating element. The heating element is responsible for heating the water in your tank, and any issues with it can result in lukewarm water or, in more severe cases, no hot water at all. Regular maintenance and timely replacement of a faulty heating element are essential to ensure your water heater operates at peak efficiency, saving energy and preventing inconvenient disruptions to your daily routine. Let us now go through the steps below.
Turn Off the Power and Water Supply
Safety is paramount when working with electrical appliances. Begin the process by turning off the power supply to the water heater. Locate the circuit breaker dedicated to the water heater and switch it off. Additionally, shut off the water supply to the heater by closing the inlet valve. This precautionary step ensures a safe working environment and prevents any water spillage during the replacement.
Drain the Water Heater Tank
Drain the water heater tank before removing the heating element to avoid flooding the space with water. A garden hose’s other end should be directed outside or toward a floor drain after being connected to the tank’s bottom drain valve. Let the water drain by opening the drain valve. The water may be hot, so proceed with caution. Close the drain valve after the tank is empty.
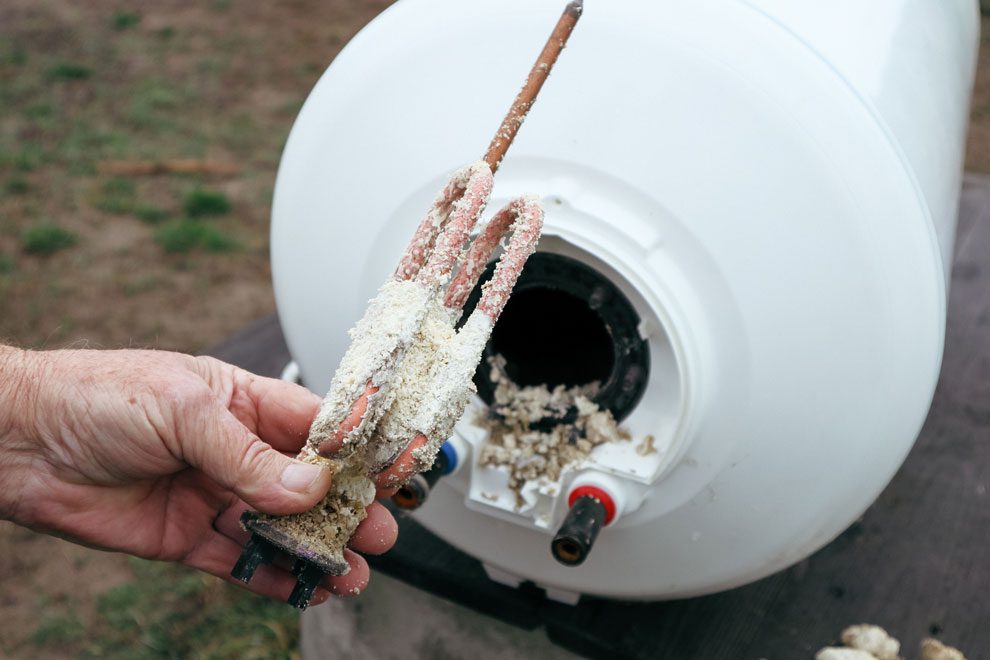
Locate and Remove the Heating Element
The heating element is typically located behind access panels on the side of the water heater. Use a screwdriver or a wrench to remove these panels and expose the elements. You’ll find one at the top and another at the bottom of the tank. Use a multimeter to test the elements for continuity. If the multimeter indicates an open circuit, it’s a sign that the heating element needs replacement.
Unscrew the terminals of the faulty heating element and detach it from the water heater. Keep in mind that some water heaters may have a combination thermostat and heating element, so you might need to replace both if they are integrated.
Choose the Right Replacement Element
When selecting a replacement heating element, ensure it is compatible with your water heater model. Check the wattage and voltage specifications, which are usually stamped on the side of the existing element. It’s crucial to match these specifications to guarantee proper functioning and prevent any damage to the water heater.
Install the New Heating Element
Carefully insert the new heating element into the water heater tank, making sure it is properly seated. Use a wrench to tighten the element securely. Reattach the wires to the terminals, ensuring a snug connection. Repeat this process if you are replacing both the upper and lower heating elements.
Close Access Panels and Refill the Tank
Once the new heating element is securely in place, close the access panels on the water heater. With the tank now refilled with water, open the inlet valve to allow water to flow into the tank. Keep a faucet open in a nearby sink to let out air and facilitate the water-filling process. Once water flows steadily from the faucet, close it.
Turn On the Power
Restore power to the water heater by switching the circuit breaker back on. Monitor the water heater as it heats the water. It may take some time for the water to reach the desired temperature. Be patient and check for any signs of leaks around the heating element.
Benefits of Timely Heating Element Replacement
Regularly replacing the heating element in your water heater offers several benefits, ensuring the optimal performance and longevity of your appliance. One of the primary advantages is improved energy efficiency. A faulty heating element can lead to increased energy consumption, resulting in higher utility bills. By replacing it promptly, you contribute to lower energy costs and a more eco-friendly home.
Moreover, a well-maintained water heater provides consistent and reliable hot water. This is particularly crucial in regions with varying climates, such as Texas, where the demand for hot water remains constant. Timely water heater repair, including heating element replacement, ensures that your water heater can withstand the demands of daily use, providing comfort and convenience to your household.
Replacing a heating element in your water heater is a manageable task that can significantly impact the performance and efficiency of your appliance. By following this step-by-step guide, you can undertake the replacement process with confidence, ensuring a steady supply of hot water for your household. As always, if you are unsure or uncomfortable with performing the replacement yourself, it’s advisable to seek the assistance of a professional plumber from Made’s Plumbing to guarantee a safe and effective outcome.