A leaking toilet tank can be a frustrating and wasteful problem to deal with, but with the right guidance, you can easily repair it yourself. Whether you’re an experienced DIY enthusiast or just looking to save some money on plumbing repairs, this step-by-step guide will walk you through the process of fixing a leaky toilet tank. Don’t let a small leak turn into a costly water bill – follow these instructions to get your toilet back in working order.
Gather Your Tools and Materials
Before you begin the toilet repair, make sure you have all the necessary tools and materials on hand. You will need an adjustable wrench, a screwdriver, a replacement flush valve, a replacement fill valve, a wax ring, and a sponge or towel to soak up any excess water. It’s important to turn off the water supply to the toilet before you start any work. You can usually find the shut-off valve on the wall behind or beside the toilet.
Drain the Toilet Tank
To work on the leaking toilet tank, you’ll need to empty it of water. Start by flushing the toilet and holding the handle down to allow as much water as possible to drain from the tank. Use your sponge or towel to soak up any remaining water in the tank and bowl. This will make it easier to access and work on the components inside the tank.
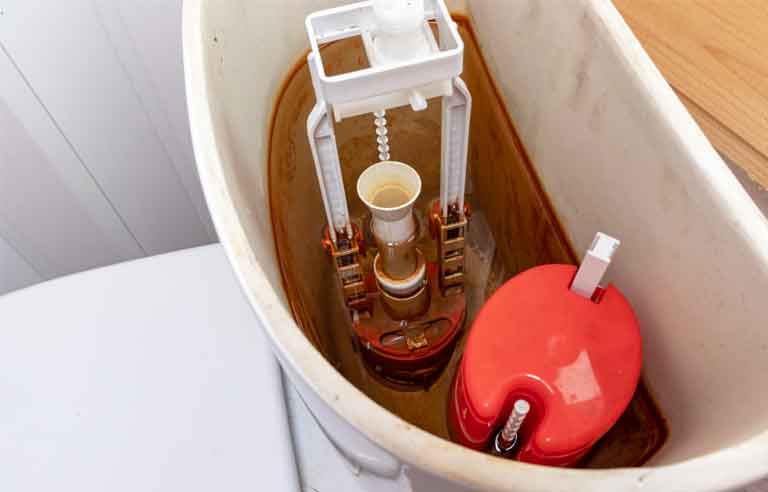
Remove the Tank Lid and Inspect for Leaks
With the tank drained, carefully remove the tank lid and set it aside. Take a close look inside the tank to identify the source of the leak. Common areas for leaks include the base of the flush valve and the connection between the tank and bowl. If you notice any cracks or damage to the tank itself, you may need to replace the entire tank.
Replace Faulty Components
If you’ve identified the source of the leak, it’s time to replace the faulty components. Start by disconnecting the water supply line from the fill valve using your adjustable wrench. Then, remove the nuts and bolts securing the flush valve and fill valve to the tank. Carefully lift these components out of the tank and replace them with new ones. Follow the manufacturer’s instructions for proper installation, and make sure all connections are tight.
Reassemble and Test
With the new components in place, carefully reassemble the toilet tank. Reconnect the water supply line to the fill valve and tighten it securely with your adjustable wrench. Double-check that all nuts and bolts are properly tightened to prevent any future leaks. Once everything is back in place, turn the water supply back on and allow the tank to fill. Check for any leaks around the base of the tank and the connections. If there are no leaks, you’ve successfully repaired your toilet tank.
A Leak-Free Toilet Is Achievable
Repairing a leaking toilet tank is a manageable DIY project for those interested in plumbing. With the right tools and materials, as well as a step-by-step approach, you can fix the issue and prevent water wastage. Remember to turn off the water supply, drain the tank, inspect for leaks, replace faulty components, and then reassemble and test your toilet. By following these simple steps, you can save both water and money while ensuring your toilet functions efficiently.